


Motorhome battery not charging? Here is the solution!
If the battery in your motorhome or caravan connected to shore power isn't charging, you can take a few steps to fix the problem. You don't need to call in expensive professionals.
Checking the wiring and fuses
Check the ones on your motorhome Check the converter's outgoing cabling and ensure that each cable is thoroughly inspected. Note the following:
- All loose or damaged wires
- Signs of melting or discoloration
- Exposed wires that come into contact with each other
- If any loose connections are found, secure them accordingly. Replace any damaged cables and check if your RV's batteries are now charging.
Take this opportunity to check for any blown inline fuses and replace them immediately if necessary.
Note: When replacing fuses, proceed with caution and ensure the amperage remains the same. Using a fuse with a higher amperage rating could lead to overheating and a potential fire hazard in your RV.
Also, assess the condition of the cables and fuses connected to your RV battery. Are there any signs of fraying, looseness, discoloration, or contact between the wires? Are any inline fuses blown? Replace them as needed.
In complex electrical systems for motorhomes, referring to a wiring diagram can prove useful, although finding one can be difficult, if not impossible. Check your owner's manual or the manufacturer's website to see if such a diagram is available.
Battery condition check for corrosion
We will then examine the battery terminals for any unusual signs of corrosion and check that the battery cables are securely attached to the battery terminals.
In my experience, this is one of the main causes of the interruption of power transmission to the home batteries when the vehicle is plugged into the mains socket.
Of course, it is essential to eliminate loose connections and remove visible signs of corrosion.
Here's how to effectively clean corroded battery terminals:
- Create a thick mixture by combining two tablespoons of baking powder with an equal amount of water.
- Disconnect the power and ground cables from the battery terminals.
- Thoroughly clean the poles and cable connections with a wire brush and paste to remove corrosive substances.
- Then thoroughly wipe the poles with a paper towel.
- Reconnect the power and ground cables to their respective battery terminals to ensure a firm and secure connection.
If your motorhome battery still does not charge, we can proceed to the next step.
Circuit breaker testing
Locate the fuse and breaker panel in your RV, which is usually in the same compartment as the power inverter.
Check for the presence of circuit breakers on the electrical panel, similar to those found in a household. These breakers specifically control the 120V supply. Your motorhome's electrical system. To check its functionality, ensure that none of the circuit breakers have been tripped by gently touching them and verifying their correct position.
Tip: Consult the instruction manual or look near the circuit breakers for relevant information that indicates the purpose of each individual breaker.
In the same area, you may also find the motorhome's fuse box, which is similar to the fuses in cars. Examine these fuses thoroughly to determine if any have blown. If you find any blown fuses, replace them immediately and check if your motorhome's batteries recharge after plugging it back in.
If all circuit breakers are properly switched on and the fuses remain intact, you can proceed to the next step.
Battery disconnect switch test
In many cases, motorhomes and fifth wheels are equipped with a battery disconnect switch located inside the vehicle. Make sure this switch is in the "On" position.
To check for the presence of a battery disconnect switch and determine its location, you may need to refer back to the operating instructions.
Checking the condition of the LiFePO4 battery
Next, we need to ensure that the problem isn't with the battery itself. It's possible that your motorhome's charging system is working efficiently, but the battery isn't retaining its charge.
Checking your campervan battery is a simple process:
-
Connect your battery to a battery charger to begin charging. If you don't have access to a battery charger during your trip, you can also use the alternator in your motorhome or tow vehicle for charging, provided your motorhome is compatible.
-
Activate the previously mentioned battery disconnect switch to disconnect the battery from the system and thus isolate it from the mains power supply.
-
Allow a few hours to pass. Afterwards, you can use a digital multimeter or voltmeter to determine the battery's charge level.
-
If you notice a significant loss of battery charge within this short period, the battery itself is likely faulty. Replace the deep-cycle battery and then recheck your RV's charging system.
If the battery passes the test, only one troubleshooting step remains.
Testing the functionality of the power converter
First, check if your inverter is successfully generating a steady current of 13+ volts DC. You can do this by measuring the voltage at the battery while it is connected to a shore power source.
Using a voltmeter, you should be able to read an approximate value of 13.5 volts at the battery.
Disconnect your motorhome from shore power and perform another voltage measurement at the battery. A voltage drop should be noticeable at this point. sein.Mit This quick test will allow you to determine if your inverter is working properly.
If it unfortunately fails to fulfill its purpose, various problems such as a defective cooling fan, a faulty temperature sensor or a defective circuit board could be the cause.
It is not advisable for laypersons to attempt to disassemble or tamper with the converter. Instead, it is strongly recommended to consult a certified RV technician who can professionally resolve the issue with their expertise.
Malfunction of resistors or diodes
Resistors and diodes play a crucial role in converting alternating current (AC) to direct current (DC). However, they are prone to failure when exposed to high temperatures. A burnt component on the circuit board is a visible sign of this. If you are not familiar with electrical systems, it is advisable to have a qualified electrician replace these defective parts.
Interruption of shore power supply
Instead of prematurely attributing the charging problem to your battery, you should definitely check the integrity of the power pedestal, especially if it's located in a campervan park. Power pedestals can also burn out or be damaged, which could hinder your battery's charging process. If you are experiencing a problem with the power connection, you must inform the park management immediately so they can address and resolve the issue.
Maintenance tips for your motorhome battery
If you are still using a conventional lead-acid battery, regular maintenance is crucial to ensure optimal performance. Consider the following methods:
-
A fully charged 12V battery typically reads 12.6 volts. A 75% charge level usually shows 12.4 volts, while a 50% charge level shows 12 volts. To extend the lifespan of your lead-acid battery, it is strongly recommended not to discharge it below 50%. If your vehicle does not have a gauge that provides accurate voltage readings, it is advisable to purchase a multimeter to measure the battery's state of charge.
-
Make it a habit to regularly inspect the battery and carefully check for signs of corrosion. Ensure it is clean and that the cable connections are secure. If you have lead-acid batteries with functioning cells, closely monitor the water level in the battery's filler compartments and top up with distilled water as needed.
-
Keep in mind that these batteries can self-discharge by up to 1 volt per month. Maintaining the voltage above 50% will significantly extend the battery's lifespan. Always keep the battery connected to an external power source and recharge it regularly. In situations where this isn't possible, or if you intend to store the battery, using a battery charger or a 12-volt solar charger may be beneficial.
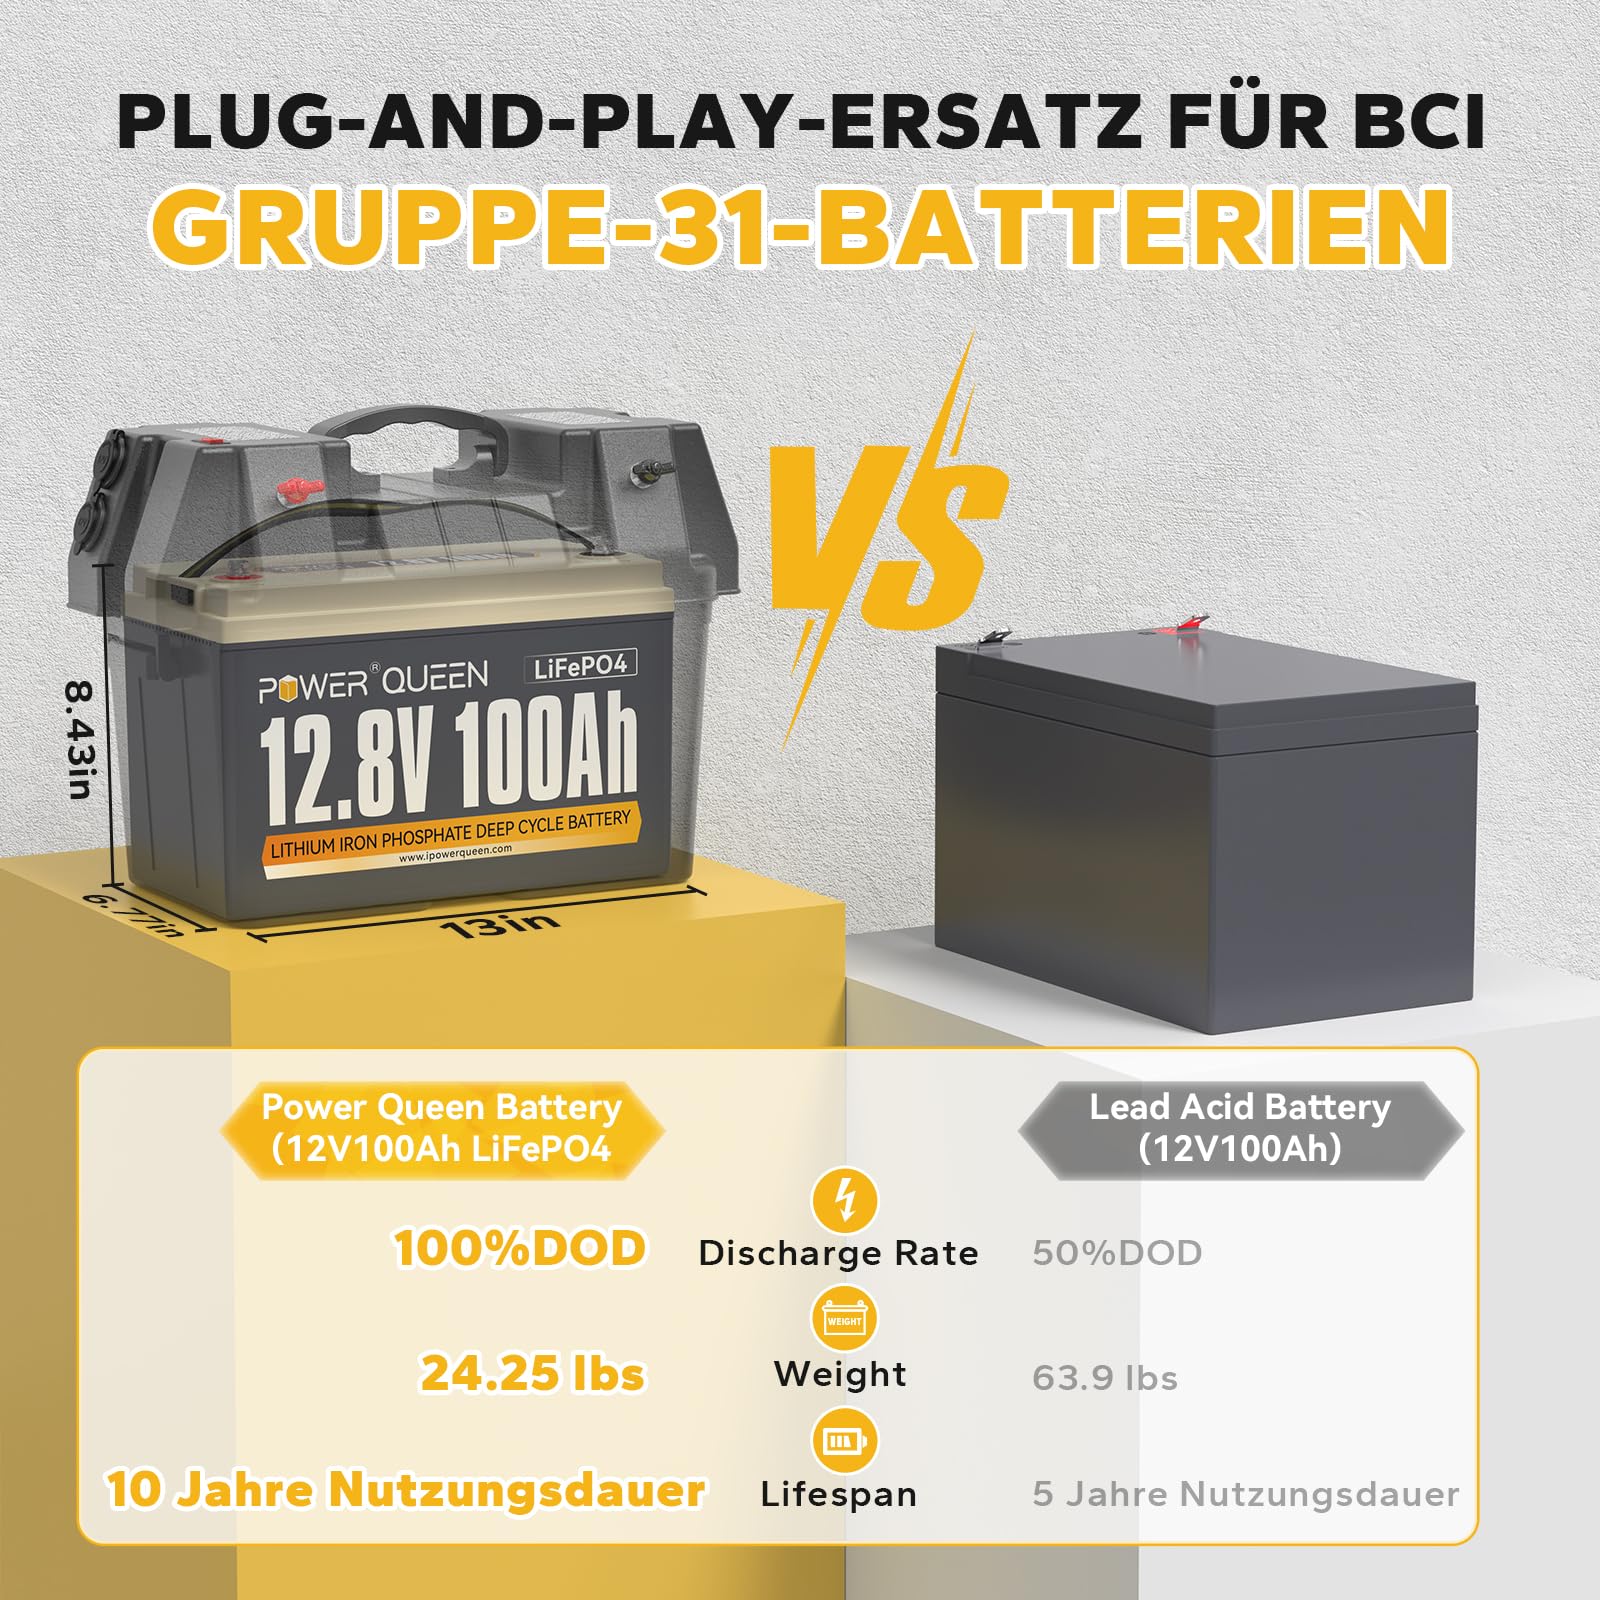
Consider upgrading your RV batteries to maintenance-free lithium iron phosphate (LiFePO4) batteries.
These batteries offer several advantages, including a longer lifespan, faster charging times, and higher energy density. They are also lighter and more compact, making them an excellent choice for RV owners looking to reduce weight and maximize storage space.
When using lithium batteries, it is important to follow the manufacturer's charging and maintenance guidelines. Unlike lead-acid batteries, lithium batteries do not require regular maintenance, such as checking the water level or cleaning the terminals. However, it is still important to keep them clean and dry to prevent potential problems.Learn more about it, how to charge LiFePO4 batteries and how to store them.
Furthermore, it is recommended to invest in a high-quality Battery Management System (BMS) to invest in a battery management system (BMS) specifically designed for lithium batteries. A BMS helps monitor the battery and protect it from overcharging, over-discharging, and temperature fluctuations to ensure its longevity and safety. LiFePO4 batteries from Power Queen They are equipped with a BMS and are safe to use.
Conclusion
In summary, proper maintenance and responsible handling of trolling motors and motorhome batteries are crucial to minimizing our ecological footprint and protecting the environment.
By choosing energy-efficient motors, using rechargeable batteries, and avoiding idling, we can save energy and reduce emissions. Electric motors offer numerous advantages over gasoline engines, including lower emissions and noise pollution.
It is important to properly size the motor for efficient operation and to dispose of old batteries responsibly to avoid environmental pollution. Regular maintenance, such as cleaning and securing the terminals, monitoring the voltage level, and considering switching to lithium batteries, can extend the lifespan and performance of RV batteries.